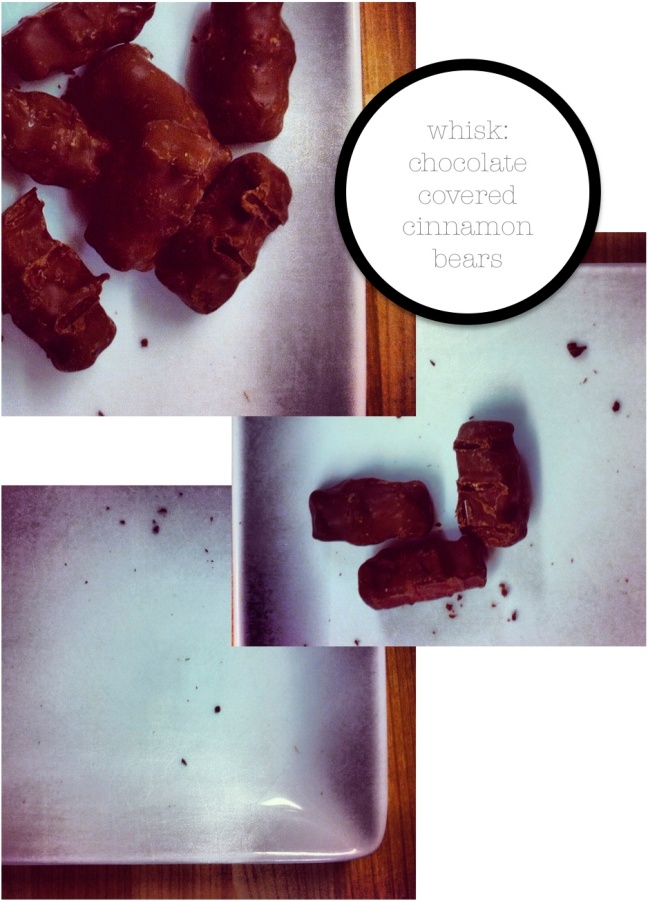
whisk: chocolate covered cinnamon bears

going, going, gone.
Chocolate covered cinnamon bears are my absolute favorite candy in the world. But I hate that I can only find milk chocolate covered in the stores. So the other night, on sugar craving whim, I decided to make my own using a combination of bittersweet and milk chocolate. After tasting these bad boys, I know I’ll never go back to store bought again.
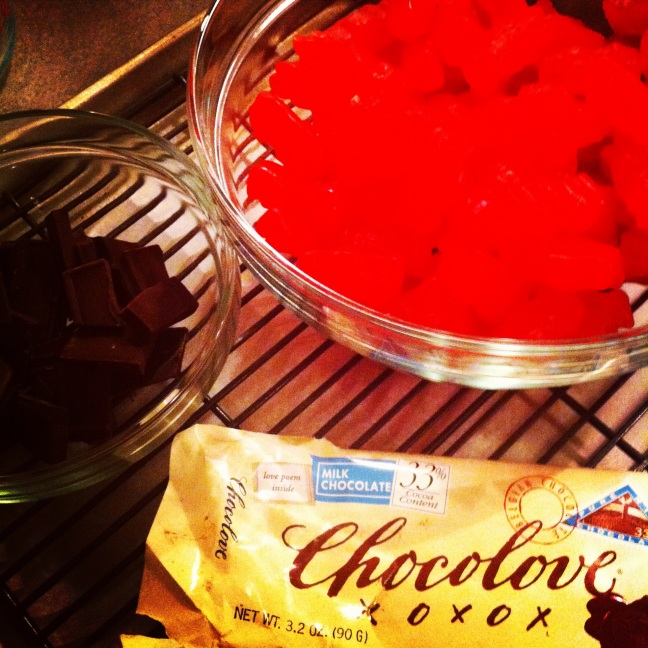

Here’s what you’ll need:
+ 8 oz. bittersweet chocolate (60% cacao)
+ 4 oz. milk chocolate
+ store-bought cinnamon bears
The key to this is tempering the chocolate, which essentially means, controlling the temperatures. So to do this, start by filling a pot with about 2 inches of water. Heat over medium heat until it just simmering. While the water is heating, take 4 oz. of bittersweet and 4 oz. of milk chocolate chop/break into pieces and place in a glass or metal heatproof bowl. Next, take a sheetpan/cookie sheet line it with parchment paper and place a cooling rack on top. Set aside.

When the water is simmering, remove from heat and place the bowl on top and stir with a spatula or metal spoon until it is just melted. Remove the bowl from the pan and stir in the remaining 4 oz of bittersweet chocolate. Stir until all the pieces are melted and then place back on top of the pot for about 30 seconds. If there are chunks, remove using your spatula or metal spoon.
Then about 10-15 at a time, add the cinnamon bears to the chocolate, roll them around until they are covered. With a pair of tongs gently shake the excess chocolate from them and place on a cookie sheet. Repeat until all of the chocolate is used and/or you are out of gummy bears.


Let the chocolate dry for at least 2 hours or overnight. Remove from the rack, serve and/or store. Consider yourself warned, these won’t last for long.


They are such a great combination of spicy with a hint of chocolate from the outer thin layer, I’m almost tempted to buy an enrobbing machine and open a sweet shop. I made about 4 dozen of these in 30 minutes on Tuesday night and 24 hours later, they were gone. I will admit that I took down my fair share of these bears and I’m nervous psyched to try others. I’m wondering if Sour Patch Kids can stand up to the heat of the chocolate and red swedish fish. I’m sure I’ll be back to share those results. In the meantime, melt some chocolate and share these with someone you love.

xoxo,
Katie

stitch: Measure twice, then measure again

To continue on the subject of measuring twice, cut once – I’m currently working on my quilt back and let’s just say it’s taking longer than expected. I cut all my strips accordingly, started to assemble the various rows and yesterday I decided to double check to make sure the strips were the same length as the quilt front. Let’s just say, I’m way off – but in a good way. All the strips are longer than the front, which is better than being shorter. So, it looks like I’ll be doing lots of trimming before I quilt the pieces together. Definitely a learning process for sure. But as Katie mentioned before, measure twice, cut once. In my case, measure again and again before moving forward. Cheers! xo Kristi


measure twice, cut once.

This old sewing adage finds it way into my life more often than I care to admit.  I have a running joke with my friends that it usually takes me two times to get something right the first time.  My sewing, crafting and baking adventures tend to fall into the trial and error category.   I feel like I’ve made so many mistakes, that I should be used to it by now, expect that I will make them but instead, I feel like I should be mistake free.  Unfortunately, that’s not the case.

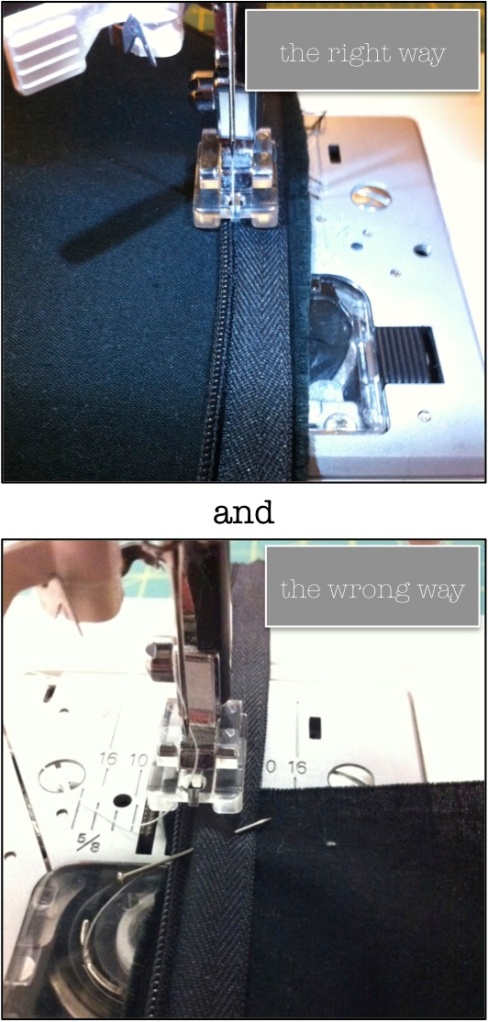
Last night was no exception, I sat down to sew a pillow cover using the zigzag/chevron fabric we showed you how to make last week, it was like a British farce.  Everything that could go wrong did.  I only had 18 inches of fabric left for the back, which needed to be 20 inches.  I sewed the zipper in wrong.  ON BOTH SIDES.   I decided to sew together fabric pieces to make the back.  Cut sewed and after I finally got the zipper in, realized that I had cut it two inches short.  At that point, I had to just walk away.

Sometimes you have to just let go, pick yourself up and try again tomorrow.  Because the thing is, everyone makes mistakes.  Everyone.  Martha, Julia, Nigella, everyone.  Mistakes Happen.  Shit Happens.  We are all just trying to get it right.

So while I know I’m supposed to always make sure to measure twice, so that i cut only once, it doesn’t always happen.  But tomorrow, I will try again.


swoon: quilt inspiration

It’s nearly the end of February, we are almost 2 months into 2012 and I have not done anything on my 2012 creative resolutions list!  So, it’s time to get cracking.   I’ve decided to rip off the band-aid and start making my first quilt.     I’ve narrowed down my inspirations to this Rothko Painting and the Hudson Bay Blanket Glacier National Park blanket.

rothko image via pinterest | hudson bay blanket image via pendelton

I love the idea of both of them and I can’t decide, I need your help! You can vote in the poll below and let me know what you want to see me make.   I’ll keep the poll open until next Friday (March 2nd) when I will let you know the winner!

xoxo

Katie

stitch: Chevron Tutorial

Now that you know how to create the squares for your chevron fabric (thanks Katie!) I’m now going to show you how to assemble your  fabric into a chevron pattern with a quilt that I’m currently working on. Step one, figure out how many squares will be in one row and then place the squares in two piles (indicated below). My Chevron quilt consists of one row of ten squares = 5 squares in two piles.  

Step two: Place the squares in a row, creating the top half of the chevron pattern. Then stack the squares on top of each other, starting to the left. I’ve found this is a great way to keep your squares in order when sewing them together.

Step 3: Take the top two squares, place right sides together and sew with 1/4in seam. Then take square 3 and place it right side together with square #2 and sew with 1/4in seam. Continue down the line accordingly until your stack is complete.

Step 4: Place your completed row right side down and begin to assemble the second row underneath row one. Once row two is complete, repeat steps 1-3.

Step 5: Place row one and row two right side down (to double check that the chevron pattern is correct) and then pin the rows right side together and sew with 1/4in seam.

Steps 6: Congrats, your chevron pattern is now complete! For those of you who want a step-by-step illustration on how construct a chevron row, download the MDG_ChevronSteps PDF.  Below is a sneak peak of my chevron quilt that is halfway finished. Quilt top is done, now it’s on to the back. xo Kristi

stitch: chevron fabric

I don’t know about you but I am obsessed with stripes lately, specifically chevron stripes.  A few months ago, Kristi and I were talking about this chevrons and I mentioned how frustrated I was that I couldn’t find any chevron striped fabric in my local fabric store.   At the time, I was ambitiously hoping to sew my own bed skirt (it didn’t happen) but she wisely pointed out that I could easily make my own chevron striped fabric using a basic quilting technique.   This is why it’s so great to have someone to share your obsessions with, a healthy dose of perspective and plethora of ideas.   This week we are going to do an entire series on the Chevron stripe.  Today, I’ll start by showing you the basics of how to build your own striped fabric and then throughout the week we will show you different ways that you can apply this in your next sewing project. So let’s get to it!

Here’s what you will need:
+ Two or more different fabrics (I chose solid grey, white and black)
+ Marking pen or chalk (optional)
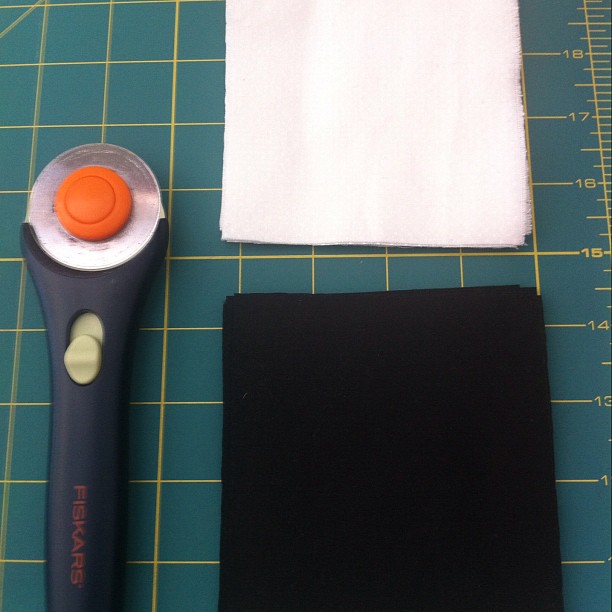
+ Rotary Cutter & Mat
+ Ruler
+ Thread, Pins & Scissors
+ Sewing Machine

Let’s start by figuring out the dimensions we want the of the final fabric we need.  I am going to use this to make a 20″x 20″ pillow cover.  So to give myself 1/2 in for seam allotments, I want to have a 21″ x 21″ square and I want to use the following pattern:

I know I want this to be 6 squares wide and 6 squares high.  21 divided by 6 is 3.5 and I want to give myself 1/4 inch on either side for the seam allotments, which means that I need my bi-colored squares to be 4″ x 4″.   I can also determine by looking at my pattern, that I will need a total of 36 squares, 24 black and white and 12 grey and white.  Which means that I will need to cut 18 squares of white, 12 squares of black and 6 squares of grey.

This project is based on a quilting technique where you sew together two equal squares of fabric to create half square triangles.

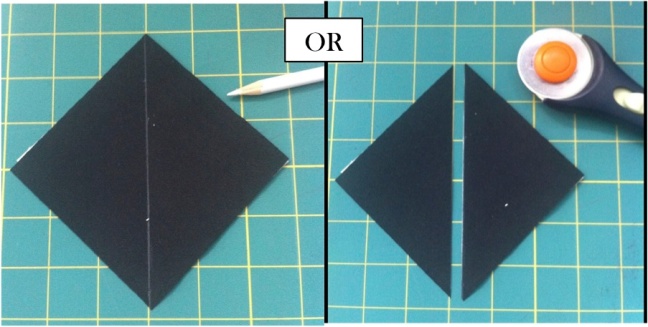
Start by placing the two fabric squares together and using a marking pen, draw a straight line along the diagonal.  Alternatively, you can just cut the fabric down the diagonal.

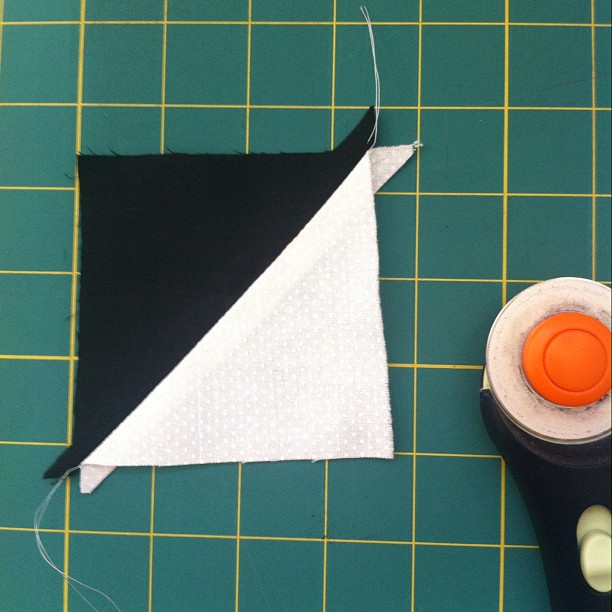
Then, using your sewing machine, with a 1/4 inch seam allotment, sew two lines on either side of the diagonal line.

Then, if you haven’t already, separate the into two squares by cutting down the diagonal and then press open the seams.

Then, using your ruler and rotary cuter, trim the excesses.  Now is also the time to make sure that your squares are even.


Once my squares are finished, I can begin to lay them out into the pattern:

You can also this technique to create a herringbone pattern like this:

Isn’t that fun!  Tomorrow Kristi will show you how to sew the pieces together and will show us her Chevron Quilt she’s been working on.  Then on Thursday, I’ll show you how to make a Chevron Striped pillow cover!

xoxo,

Katie

stitch: pillowcase dress tutorial

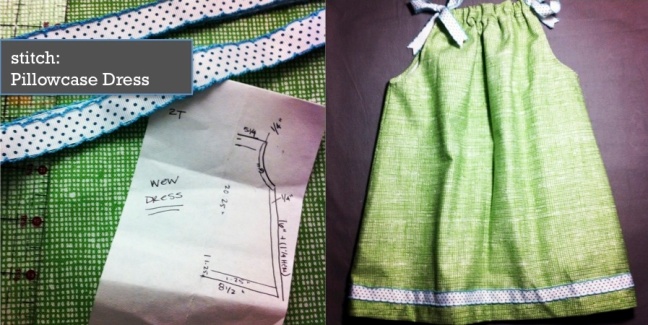
One of my favorite kids is turning two next week and for her birthday, I decided to make her a pillowcase dress. This simple pattern is so fun because it doesn’t require any special materials and is washable, because its cotton — a must for any active girl and her parents!

This sweet birthday girl has the biggest blue eyes, so I decided to go with a green and white Lisette fabric and my favorite blue and white polka dot ribbon. The following tutorial fits a size 2T little girl.

Here’s what you’ll need:
+ 1 yard of cotton fabric
+ 2 1/2 yards of 3/4 inch wide grosgrain ribbon
+ Rotary Cutter & mat
+ Ruler
+ Sewing Machine, pins, scissors

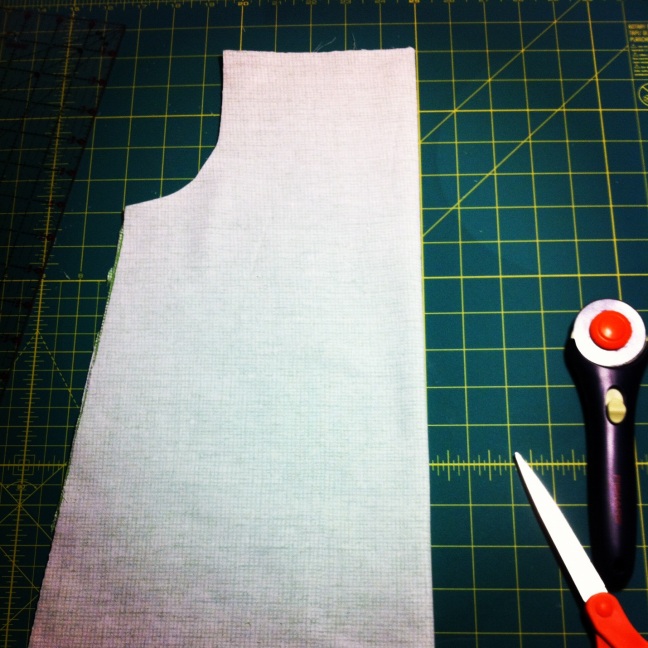
Start by washing, drying and ironing your fabric. Fold the fabric in half lengthwise (with the selvages together). Using your ruler remove the selvage. Then using the following measurements, cut your fabric:

Since you will need two identical pieces, a shortcut is to fold the fabric twice. So after your first fold (matching the selvages, fold your fabric again widthwise.) The original fold should be lined up against the 20 1/4 inch cut and the second along the 10 inch or bottom of the dress. I’m a visual person, so here is the process (using different fabric). Click the image to enlarge.

So once you have everything folded and lined up, use your rotary cutter and ruler to cut according the measurements listed above. The armholes should be 6 inches down from the neck and 3 inches out.

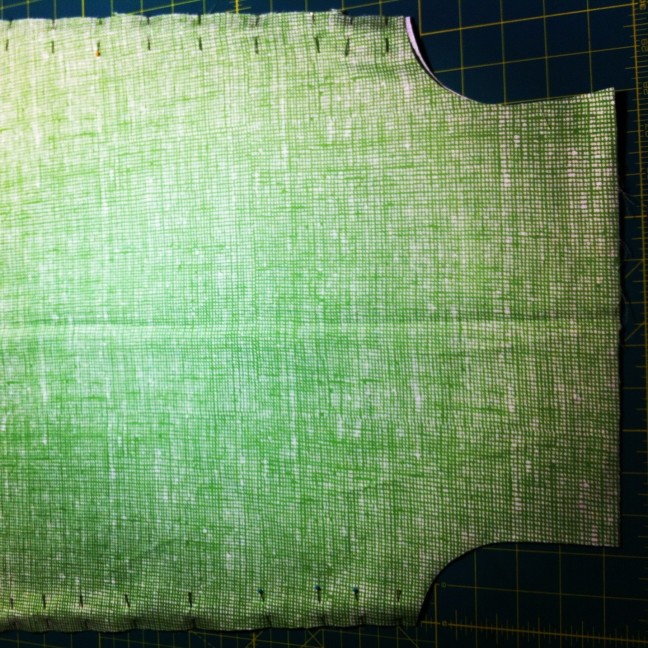
Once you have cut the pieces out, make one last cut along the bottom (10 inches folded) to make two separate matching pieces. If you are using a patterned or striped fabric, you will want to take extra care in cutting your fabrics so that your stripes or pattern line up. If this is the case, make a template using copier paper and lay it out on the fabric before cutting. And you may need more than 1 yard of fabric to make sure your patterns match.

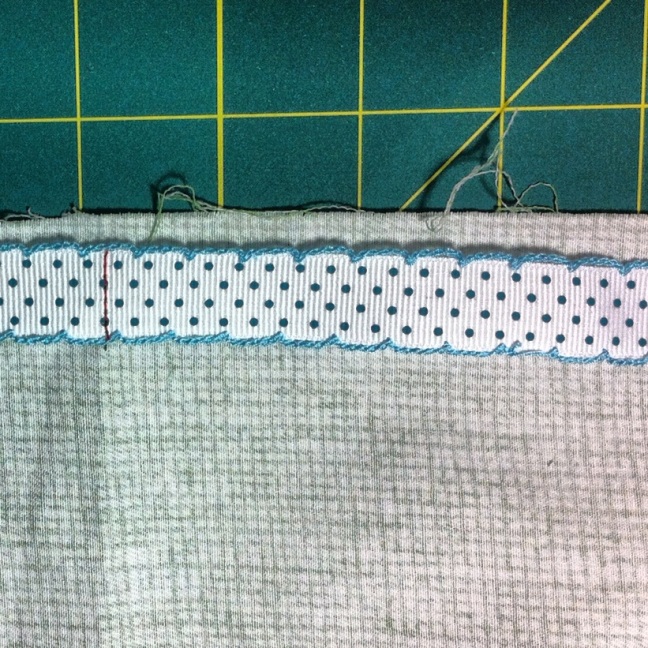
Once you have cut the two pieces, lay them flat on your table. Cut two 20 inch pieces of your grosgrain ribbon, place the top of the ribbon two inches from the bottom of the dress (the 10 inch cut, 20 inches long if unfolded) on the right side of the dress. Pin and sew ONLY the top of the ribbon in place.

Then, place the two pieces wrong sides together down on your table. Pin from the bottom of the armhole to the bottom of the dress and sew using a 1/4 inch seam allowance. Remove the pins and press the seam to one side using your iron. Make sure that it is on the appropriate setting for your fabric so that you do not damage it. Do not press the seam open! Repeat on the other side. Then turn the dress inside out. Again, pin from the bottom of the armhole to the bottom of the dress. Sew again, using a 3/8 inch seam allowance. This is called a french seam and eliminates the need to surge or zigzag the edges.

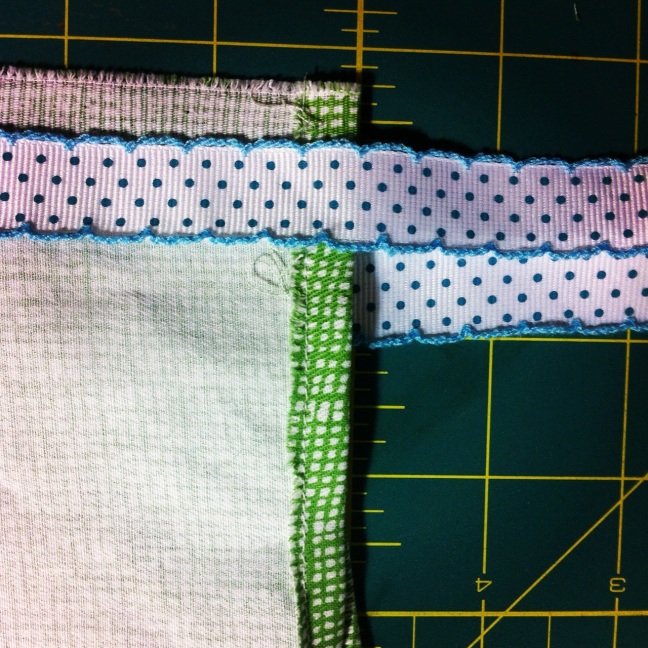
Next, with the dress inside out, fold and pin the armholes in using a 1/4 inch seam. Carefully sew in place. Cut the remaining ribbon in half, you should have two 25 inch pieces. Find the center of the ribbon and pin the wrong side of the ribbon to the wrong side of the neck at the center. You will want to pin the ribbon 1/4 inch from the edge. Sew in place the width of the ribbon. This will hold the ribbon in place but will still allow you to gather the fabric on it later to form the neckline.

Once the ribbon is sewn in place, fold both the ribbon and the fabric down 1 1/4 inch to create the casing at the neckline. Pin in place and sew. Be careful not to sew the ribbon during this process. This will prevent you from being able to gather the fabric on the ribbon for the neckline.

Lastly, finish the dress by sewing the bottom hem. Fold the raw edge of the fabric up 1 inch and pin in place. Turn the dress right side out and make sure that the bottom of the ribbon is pinned in place. Make adjustments if necessary. Then turn the dress inside out and sew the hem in place.

Once you are finished, turn the dress right side out and gather the fabric on the ribbons at the neckline and tie the ribbons into bows. There you have it, the pillowcase dress. I can’t wait to see her in it! I imagine, it will look a little something like this:

Blurry (because two-year olds are very busy…) but loved. Happy Birthday WEW!

xoxo

Katie

stitch: Sewing Inspiration

Many times when starting a new sewing project, I’m guided by various patterns and art I find on the interwebs. For instance, I stumbled across illustrator Melanie Mikecz on pinterest a few months ago and was blown away by some of her work.

Specifically, I think this print is an amazing pattern for a quilt and rest assured, it’s going to be my next big project. Don’t worry, I’ll keep you guys posted on how it goes. I have a feeling there will be quite a few trial and errors. To view more of Melanie’s work, please click here. Cheers! xo Kristi


whisk: biscoff and dark chocolate ice cream

Even though this week in Colorado its so cold that we aren’t even expected to break 40, I’m on an ice cream kick.  I’m blaming it on my obsession with Biscoff spread.   Since my first taste of it I’ve been wanting to make ice cream with it.  Just imagine it on a piece of Apple pie, perfection.  As we’ve previously discussed, Biscoff is not like a fatty nut butter or even Nutella when it melts and then cools.  It has a tendency to form into chunks, so for the ice cream, I borrowed the Biscoff ganache method and folded that into vanilla ice cream along with some crushed up Biscoff Crackers.  I have been getting some questions on where to buy Biscoff, I’ve found it at my local Cost Plus World Market but they have a great store locator here on their site.

If I can be so bold, you should run out to get some because OMG you guys this ice cream is to DIE FOR.

Here’s what you’ll need:
+ 1 c. whole milk
+ 2  c. heavy cream
+ 1/4 c. sugar
+ 3 teaspoons vanilla
+ 1/2 14 oz. jar of Biscoff Spread (you can guesstimate on this one)
+ 1/2 c. chocolate chips
+ 1/4 tsp. ginger
+ 1/4 tsp. cinnamon
+ Approximately 10 biscoff crackers, crushed.

1. In a heavy bottomed sauce pan, stir together 1 c. whole milk, 1 c. heavy cream and 1/4 c. of sugar.  Then heat to a simmer and stir until smooth.  About a minute.  Remove from heat and stir in vanilla.  All to cool to room temperature (about 30 minutes)

2. In a glass bowl over a double boiler or in your microwave melt chocolate chips.  If you are using your microwave, heat in 30 second increments stirring between each round.  This should melt in 2-3 minutes.

3.  In a mixer fitted with the whisk attachment, beat the melted chocolate and biscoff spread, whisk until combined.  Add remaining cup of heavy cream (make sure this is cold, fresh from the fridge), ginger and cinnamon.  Beat on high until soft peaks form.

4. Once the milk mixture is room temperature, pour into your ice cream maker and stir for 10 minutes.  Once you’ve reach a soft serve state, fold in the biscoff cream mixture.  Stir for another 5 minutes. Then pour in about 10 biscoff crackers crushed into small pieces and stir until mixed (about a minute).

5. Place in a freezer proof airtight container and freeze overnight.

Holy cow, this one is good.  It starts with a flavorful chocolate ice cream flavor and finishes with ginger, spice cookie.  It’s worth trying, let me know if you make it!

xoxo

Katie

stitch: Last minute Valentine’s Day Gift

I got home last night and realized I had yet to create something for my friends at work for Valentine’s Day. So I rummaged through my fabric stash and came across the mother of all Valentine’s fabric, Alexander Henry’s Look of Love. Thank you CityCraft for carrying such awesome fabric.

Look of Love indeed!

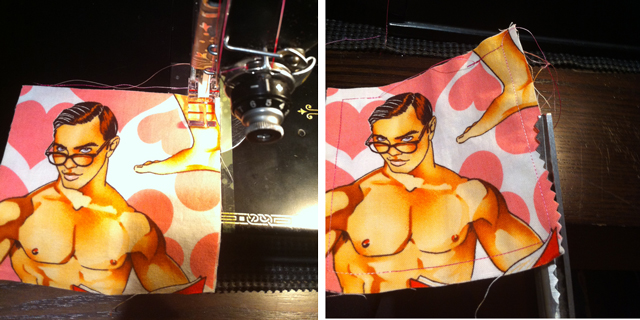
Be still my heart! I had just enough to make coasters for my co-workers desk. Perfect accessory for the office, right? Right. I cut 4 inch squares, then placed the fabric wrong side together, top stitched with a 1/4 inch seam and then trimmed each coaster with pinking shears.

This project took all of 5 minutes folks, which is a big win in my book for last minute gifts.

Happy Valentine’s Day! xo Kristi